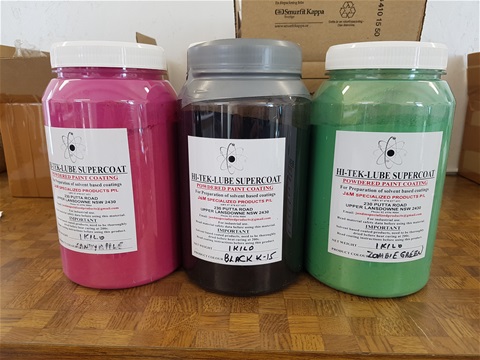
www.blykula.com selger Hi-Tek coating laget i Australia. Vi er de eneste i landet som selger denne coatinga, og denne må ikke forvekslet med pulverlakk da det er et helt annet produkt, selv om begge produktene kommer i pulver-form.
Denne coatinga er laget av
Joe Ban
J & M Specialized Products
61 (02)65569004
I første omgang så svarer jeg gjerne på spørsmål fra mine kunder. Om ikke jeg kan svare så kan han nås på mailadressa ovenfor.
Detaljerte instruksjoner finner du imidlertid her:
COATING INSTRUCTIONS
Powdered product is a complete package, for preparation of solvent based coatings.
Read the details below before starting.
*Use adequate protective gear including chemical resistant gloves, safety glasses, a respirator adequate for painting and USE COMMON SENSE. You are dealing with chemicals and flammable liquids & solvents. Use in an area where there is adequate ventilation to remove solvent and oven fumes generated. Do not use any oven you intend to cook food in.
TOOLS AND EQUIPMENT:
1. HI-TEK-LUBE COATING, POWDERED VERSION and Pure Acetone, or M.E.K.
2. The safety gear noted above.
3. Measuring tools. (A set of cheap metal or plastic measuring spoons works well)
4. Plastic containers to tumble/coat bullets in. (A small 5 liter bucket or disposable food containers are good, but any reasonably strong, clean plastic container should work)
5. A container to mix the coating in. (A transparent or similar dispensing
bottle with a thin nozzle does a great job) Ensure that coating and solvents do not affect containers used for mixing coatings.
6. Waste newspaper, paper towels or waste rags and plastic sheeting to protect bench tops.
7. Acetone. (This will be used
to both mix the bullet coating and for clean-up)
8. A well-ventilated area for working in. (Not your kitchen or basement). Use in an open garage, car port open to ventilation, and away from open flames)
9. Flat wire baskets capable of holding the
weight of bullets and withstanding the heat of the oven. (If you can’t find something adequate they are fairly easy and cheap to make from 1/4” wire Mesh or similar)
10. An oven that can hold a temperature fairly well. You will need to test ovens ability to hold at set temperatures and temperature set accuracy. (A toaster oven with a circulation fan can, be obtained cheaply and works great)
11. Clean lead bullets that have not been sized. If your bullets have wax, Alox, or any other lubricant on them, the acetone will dissolve it and contaminate the coating and you will experience failures.
Clean lead will produce great coating, waxy or dirty lead will cause coating failure. Sized lead bullets may reduce adhesion of the coating to bond to the lead, as the sizing process can close the pores on the surface of the bullet.
12. A little patience. Read the instructions fully BEFORE starting, and take your time.
The coating process is not difficult but it can take a little practice to do it well.
If it doesn’t go well the first time, go back and read the instructions again, usually a simple mistake is the problem. If you keep having problems contact us, we’ll be happy to help.
WHAT YOU NEED TO KNOW BEFORE STARTING.:
1. A little goes a LONG way, start out with the smallest amount you can mix and to coat around 200-300 bullets. If coating appears a little thin you can always re-coat them again after baking.
2. Two or three, or even four thin coats works great. Applying thick coats will be rough looking, and will probably crack and flake off during sizing or loading as it also may not cure correctly.
3. Bullets with sharp edges and little flakes of lead hanging from them will coat fine, but during loading or sizing the flakes will usually break off and leave exposed lead. This isn’t the end of the world, but it can defeat the purpose of the coating. Smooth surfaces work better and the bullets tend to be more accurate.
4. Allow the bullets to dry fully once they are coated.
If they go into the oven wet, the coating will bubble up and look rough, and the fumes are harsh and can be flammable. Give adequate time to dry, don’t rush drying, the warmer and drier the space you work in the better. Coating may take as little as 10 minutes to several hours to dry. This is dependent on the ambient temperature and humidity.
5. Having several batches of bullets rotating through the oven at once will speed things up quite a bit, but wait until you get the hang of it before trying it. Once you have successfully done three or four batches of bullets you’ll feel like an old pro.
6. When you mix the coating, it’s better to have too much solvent than to have too little. Thick coats = bad bullets, thin coats = good bullets. A LIGHT STAIN IS BEST!
7. Experiment with your mix a little if your results aren’t what you want. Adding or taking away powder will usually cause coating failure. However, a little “fiddling” with the amount of Acetone can really make a difference depending on your working conditions.
8. For mix ratios of the powdered coating should be 20 grams (309 grains) to 100 milliliters
(3.3 – 3.4 ounces) of acetone.
Use a mask and be careful, the fumes coming from the coating mix is NOT something you want to breathe.
9. Wear work clothes or an apron and cover your work area with a plastic sheeting, if you want to avoid stains. The first few times you use the coating it will be messy. Even after you get the hang of it it’s not a particularly clean process.
10. Reloading with HI-TEK-LUBE coated bullets should be done using quality reloading equipment with data obtained from a reloading manual. Use loading data that is normally used for your particular bullet and application. We do NOT provide ammunition loading data.
11. In most cases HI-TEK-LUBE bullets can be sized without further lubrication. Some harder alloys, or drastic size reduction requirements, additional lubes such as Hi-Tek Aqualube 5000 can be used to reduce loads on sizing equipment.
STEP BY STEP COATING INSTRUCTIONS
1. Get a measuring spoon, mixing bottle, coating (the catalyst is built into the powdered Hi-Tek) and solvent. Mix 20 grams (309 grains) of powdered coating to 100ml (3.3-3.4 ounces) of acetone. We recommend letting the freshly mixed coatings sit in a sealed container for 30-45 minutes to ensure that all components are fully dissolved. Remember that coatings need to be well shaken before each application.
Note: In Hot/Dry climates you can substitute 10-25% of the Acetone and replace it with a like amount of Denatured Alcohol. This will slow down solvent evaporation and allow a slightly longer swirl/tumble time.
The coating separates in the bottle pretty quickly, so you’ll need to shake it well to make sure it’s mixed. Dropping a bullet into the bottle of coating before shaking will speed this up a LOT, as the suspended solids in the coating will settle to the bottom and stick.
The bullet will bounce around like the marble in an aerosol paint can and mix things thoroughly.
2. Turn on your oven to reach about 200C (385-400 degrees Fahrenheit).
3. Put the lid on the mixing bottle, cover the tip of the spout and shake for a few seconds to get everything mixed. During this shaking a small amount of pressure will build in the bottle, be careful when you take your uncover the spout, or the mix can spray out with the pressure.
4. Pour a VERY SMALL amount (we recommend 1 ml per pound of bullets) of mixture in the container uncovered with the bullets and start shaking. Shake them and rattle them around pretty rapidly, a good rule of thumb is to shake them as hard as you can without shaking them out of the container. Keep shaking for 15 to 20 seconds and do not allow the solvent to evaporate, which will happen quickly. (You will hear a distinct change in the sound of the bullets rattling around when the solvent evaporates).
5. After shaking for 15-20 seconds, empty coated projectiles onto a wire mesh or basket. Make sure there is room under the basket for air to circulate and allow even drying.
Spread them out until they are not touching each other. At this point the coating will be thin and a little sticky and you should still see lead through it fairly easily.
If the coating looks rough or has a lumpy surface you likely used too much mixture, not enough solvent, or shook/tumbled too long. This is not a big deal; just run them through like that or the uncured coating can be washed off with clean solvent and re-coated.
6. While the bullets are drying, cap the bottle with the mix still in it and set it aside, and store out of sunlight and keep cool. The same mixture will be needed for the next round of coating. You can speed up the drying process by using a fan to blow onto the bullets, but don’t rush it; the bullets need to be fully dried before they are baked. Thinner coats dry faster and more completely.
7. Once the bullets are fully dried and the oven is set, put them in for 8-12 minutes to cure the coating.
(NOTE: the wide swing in cure times is due to the wide variety and quality of ovens in use. You will need to experiment with your particular oven and its ability to adapt to load that is being cured). The coating may change color slightly during baking, don’t worry, it’s normal. After first coat is cured, perform the test listed below.
8. Once the bullets are baked take them out and let them cool fully before the next application of coating and test to make sure coating has cured properly. If the bullets fail the smash test after the first coat, subsequent coats will fail as well. First coat success is critical to achieve success.
After the bullets are thoroughly cooled inspect them, the coating should be fairly smooth and even, and should not scratch easily with a fingernail. See testing on final page.
9. Repeat the process (usually two coats will do, but feel free to experiment) until the coating completely covers the bullet and little or no lead can be seen through it.
10. Size and load your coated bullets with appropriate Lead Bullet loading data from your favorite reloading manual.
TESTING THE BULLETS.
It is very important to test after each coat. If the first coat fails, subsequent coats will also fail.
Remove one or two bullets from the batch of bullets you have just coated after they have cooled to room temperature. Use a clean rag or paper towel and moisten with acetone. Rub the test bullets back and forth for 30 seconds. If proper curing has been obtained, there should not be any of the coating removed from the bullet and the towel should be free of any colour transfer from the bullet.
If it fails this test, STOP, and start over.
Failures can be caused from low bake temperatures, improper bake time, not allowing coating to totally dry, too much coating used, or wrong mix ratio and of course dirty or contaminated cast alloys..
Remember, it is better to use a little too much acetone and have VERY thin multiple coats as opposed to one thick heavy coat!
NEXT IS THE “SMASH TEST”
Place the above bullets on the floor or other sturdy object and literally smash the bullet with one blow. Check to see of the coating has become brittle by flaking off.
If this has happened, the bullet has failed the test and you must start over. The most common cause of flaking is applying the coating too heavily and/or inadequate dry time before placing in oven.
If after baking, the color is Tan going towards Brown, the cooking time or temperatures were not correct. (Usually too hot or too long of time in oven or a combination of both).
BASIC DATA AND MIX RATIOS
POWDER.
Mix 20 grams (309 grains) of powdered coating to 100ml (3.3-3.4 ounces) of acetone.
Bake Temperature: (385-400) Degrees Fahrenheit (200C)
Bake Time: Approximately 10 Minutes, and will
depend on oven, air circulation and loading.
Initial drying Time: Normally 10-30 Minutes.
However, depending on ambient temperature and humidity levels,the drying time may take substantially longer. (1-24 hours)
Note: In Hot/Dry climates you can substitute 10-25% of the Acetone and replace it with a like amount of Denatured Alcohol. This will slow down solvent evaporation and allow a slightly longer swirl/tumble time.
SAFETY NOTICE
Solvent and vapors are highly flammable.
TAKE CARE. USE IN WELL VENTILATED AREAS
(Use common sense).
PLEASE BE CAREFUL when handling toxic metals (Lead or its alloys) and chemicals.
All precautions should be taken, to minimize exposures to user from contact with lead alloy, coatings & mixtures.
THIS IS NOT POWDER COATING AND SHOULD NOT BE USED AS SUCH!
HI-TEK POWDERED COATING PRODUCTS NEEDS TO BE FIRST MIXED WITH A SOLVENT, PRIOR TO USE AND TUMBLE COATED ONTO YOUR BULLETS.
IT SHOULD NOT BE ATOMIZED, SPRAYED ONTO, OR ATOMIZED ONTO YOUR BULLETS,
EITHER IN POWDER, OR IN A LIQUID FORM!
FOR FURTHER ADVICE CONTACT THE MANUFACTURER or SUPPLIER
There are no products in this category.
Del denne siden